
Using Logic Pro for surround sound work and ambisonics
This is a living document, being constantly updated - email me if you think I’ve missed anything out! Last updated 2ND JAN 2026. If you’ve got anything that should usefully be on here, please email me.
Apple’s Logic Pro software can be used for doing 5.1 and 7.1 surround sound work, but it does have a number of quirks to how this is implemented. These features are also not documented fully in the manual. This page attempts to outline how to use Logic for surround sound work. Much of the same applies if you are using Logic for ambisonic work (you can do first order ambisonic work by setting up the surround system in Quad (4 channel) mode in File > Project Settings > Audio > General). To enable any Surround functions you need to go into Logic’s Preferences > Advanced and tick the Surround option.
If you’re new to using Logic for post-production work, it is worth also researching how to set your project to have the correct Frame Rate in File > Project Settings > Synchronisation, and to ensure that any movie files you receive are the same frame rate as the final project (make sure they don’t send you a 25fps rough edit when the final version will be 30fps). It’s also worth researching how to import a movie into Logic, how to use the Lock and Unlock SMPTE functions on the audio file from the imported movie, and also how to mute the movie soundtrack on the movie itself: File > Project Settings > Movie > Movie Volume. Finally, the File > Movie > Export Audio to Movie function is very handy to send your soundtrack off to be auditioned.
Most screenshots and bugs are from Logic version 10.5.0, but nothing has changed up to v11.
5.1 Surround sound typically contains a Front Left channel, Front Right, Front Centre, Low Frequency Effects, Surround Left and Surround Right. These are referred to here as FL, FR, FC, LFE, Ls and Rs. Much of the following applies to 7.1 surround sound, which adds Rear Left and Rear Right channels. Logic is now capable of outputting Dolby Atmos format surround sound (as of v10.7) , which evolves 7.1 to 7.1.2 or 7.1.4, where the latter number is either 2 or 4 overhead speakers. Dolby Atmos also works significantly differently, in that rather than exporting a 7.1 mix, you export a 7.1.4 mix, plus a bunch of stems with panning metadata embedded within them. This format was originally designed for cinema, but Apple is incorporating it in Logic Pro as a spatial audio format to deliver head-tracked binaural audio over headphones for music listening.
Importing Files, and the key difference between the Surround Balancer and the Surround Panner plug-in
Logic makes it very easy to import mono and stereo files. Surround files are considerably harder. There are two options:
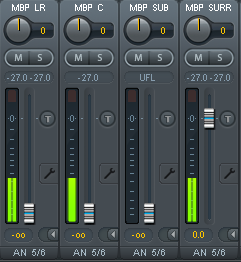
Drag and Drop - this will typically import a surround file as multiple mono files, where you’ll end up with 5 regions on 5 tracks that each need panning to the appropriate output. You can create a track stack to better manage these. But your session will become extremely messy very quickly as you’ll need to dedicate 5 mixer tracks for every single surround file you bring in. There are instances where you might want to do this, for example if you want to rebalance the surround file in more detail, or you just want to use the centre channel of the file. When you have mono or stereo files routed to a Surround Sound bus, Logic will automatically insert a Surround Panner to replace the normal pan control. The Surround Panner is designed for routing one or two inputs to your 5.1 outputs.
Import files - If you use the File > Import > Audio Files (shortcut Apple Shift I) this will typically import a surround file as an interleaved surround file, so it appears as one region on one track, as is typical for importing mono and stereo files. This is a lot neater. When you have a surround file routed to a Surround Sound bus, Logic will automatically insert a Surround Balancer to replace the normal pan control. The Surround Balancer is designed for routing your 5.1 files to your 5.1 outputs, which is why the surround balancer pan (the little circle) is set in the middle and the LFE is at 0dB.
These icons indicate how many channels the source file has.
These icons represent which inputs from the file Logic will utilise. You can long-click on the input icons to force Logic to use certain inputs on certain input types. For example, long-clicking on the stereo icon allows you to choose to use a mono version of the stereo file, or just the left or just the right channel.
Logic will replace the pan control with a Surround Panner or a Surround Balancer depending on the input type. Typically mon o or stereo files will have a Surround Panner, whilst a surround file will have a Surround Balancer. If you long click on the surround file input icon in the mixer (as in the image above) and tell Logic to use just the left channel of a surround sound file, it will replace the Surround Balancer with a Panner.
However… Bug #1 & Bug #2
I believe there is a conceptual flaw within Logic about importing surround files, which is that it can’t properly import a 5.0 file (FL, FR, FC, SL, SR) into a 5.1 (FL, FR, FC, LFE, SL, SR) project. That’s important because a surround sound *recording* will rarely have a sub-bass LFE channel because surround microphone arrays (like a Decca tree) don’t typically have microphones to record LFE. Consequently often when you are dealing with surround sound recordings, you are typically importing 5.0 files. As another example, if you purchase sound effects from one of the largest sound effects providers, Boom Library, they are often provided in 5.0 format. When you mix all these 5.0 recordings together, along with music, dialogue, etc, you then choose to mix some of those inputs into the sub-bass LFE channel. So generally speaking, when you use Logic you are importing mono, stereo and 5.0 files to generate a 5.1 mix, typically when creating a mix from scratch, 5.0 format is generally what we might import, and 5.1 is what we generally export. Currently, when I import a 5.0 audio file into Logic, it identifies it as a Surround File, and suffixes the Surround icon to the Region Name, and it loads up a Surround Balancer component in place of the Pan control, and routes the file to the Surround Bus. However a bug appears, when I press Play: only the audio from the Front Left Channel plays out. Any audio on Channels 2, 3, and 4 is completely ignored, which obviously is quite problematic! Additionally, if you look at the Mixer page for that channel, you will see that it meters the audio from Front Left, on both the Front Left and Right channels, but routes the audio to Front Left, Right, Centre, Surround Left and Surround Right. So the three problems here are: 1) Audio from channels 2-5 is ignored. 2) Audio from channel 1 (Front Left) is routed to all outputs, rather than just to Front Left, even though the Pan Balancer is placed centre. 3) Audio metering on the input channel doesn’t correspond to anything that is happening audio-wise. Currently the only way to import a 5.0 surround sound file is to use the drag and drop approach above, bringing it in as multiple mono files, and routing them to the correct outputs (you can then use a Track Stack to consolidated it visually to one track). Very boring.
Sometimes I will open a 5.0 file in Twisted Wave and add an extra silent channel (the LFE channel, as the 4th channel in the file) so that I can Import it (not drag) into Logic so it will appear as a single region on a surround channel. This would be slightly irritating to have to do on its own, but this is where Bug #2 appears. If you split your imported region up into two regions (for example to edit out something), then try and do a cross-fade between those regions, the cross-fade simply won’t work at all. I can’t find any logic or consistent pattern as to why it seems ok on some files, and not on others.
A 5.0 channel file imported using the Drag and Drop method. Each track has then been panned to the correct outputs for each channel of the audio file. A Track Stack can be a useful way of organising tracks when you have to import files like this.
Surround panner settings
It’s actually quite difficult to tell where you’re routing audio too using Logic’s Surround Panner. It is not remotely intuitive. This can cause real difficulty when you need to be very precise, for example if you are routing specific ambisonic files to their corresponding inputs on a plug-in.
Below, you can see what the different pan settings actually produce in terms of levels to the different speakers. I’ve highlighted the more useful ones in Yellow, or if you’re not interested skip to the Further Control section below.
You can also download the Panner Presets I’ve worked out based my tests here (put them in your Music > Audio Music Apps > Plug-In Settings > Surround Panner folder).
Mono input
The following is measured using a -20dBFS 1kHz mono sine wave.
Default pan position
The default pan for a mono sound file is a bit interesting. The -20dB file hits the outputs at these levels: FC at -21dB, to FL and FR at -32dB, and to Surround at -34.7dB


To route mono input to Front Left only
This pan position gives us -20dB to Front Left only.


Increasing the Diversity
Increasing the diversity from 0 to 0.15 feeds the sound in to the other channels - note the level in FL starts to drop the more diversity you add. Also note that visually it looks like we’re only routing to FL and FC, but actually the sound is going to all 5.0 outputs - it is going to FL at -38dB, and to FR at -39dB, and to Ls at -39dB. Increasing the diversity up to 0.5, the Front Left output has dropped another 2dB. and the other outputs have gone up 10dB. With the diversity up to 0.75, the audio is down 5dB to FL, and going to everywhere else, only 3dB below the FL level. With the diversity at 1, the signal is going to all outputs, but at a reduced level. The -20dB sine wave is hitting all outputs at -27dB. This makes sense (when you pan a sound C with a stereo panner, it is -6dB to L and R channels, compared to when it is panned hard L when it goes L at 0dB - see pan laws). But there’s no way to override that setting in the panner.


Routing to Centre
Logic does provide you with options on how much a signal goes to the FL and FR vs the FC channels. Different people have preferences about what they put in, or leave out of the FC channel. The current convention is that dialogue goes to the FC channel, with very little in the FL and FR channel, and that music and FX route to the FL and FR channel, and there’s not much of them in the FC channel. This is just a convention and there are countless exceptions to this. But generally it helps the intelligibility of the speech to have them coming out of separate speakers. Whilst this can encourage you to mix the music and FX at a louder volume, it’s very important to listen to a stereo down mix at some point as most people will listen to that version, which will probably be less intelligible. I suspect a lot of #MumbleGate scenarios occur because material is being mixed in 5.1 but primarily being heard in mono or stereo.
To route mono input to Front Centre only
Routing to Centre and to FL and FR
This is where using the panner intuitively goes very wrong….
The wrong way
From our previous experiments we’d imagine that just increasing the diversity is all we need to do. But even a minor deviation from 0 starts adding the signal into the surround channels too. From the panner it would look like we’re sending the signal equally to FL, FR and FC and not to the surround channels. But actually, FL and FR are 15dB quieter than FC, and Surround is only 3dB quieter than FL and FR. The visual representation on the panner bears no relation to what we hear.
The correct way to route to C and FL and FR
Instead, we have to use a combination of the diversity controls, the centre channel volume control, and the channel on/off controls. The diversity control at 1 sends it to all outputs, we then turn off the Ls and Rs channels using the speaker icons, and finally we boost the centre channel by 3dB so it is predominantly in the centre, and down 3dB in FL and FR.
Routing to Surround
The angle needs to be at -110 (or 110) for the signal to route only to the Ls channel. The further away from 110 you get, the more the sound goes to the Front or opposite Surround speaker.
Stereo inputs
The following is measured using two different files: firstly using a 2 channel file with a -20dBFS 1kHz sine wave on both channels; and secondly, with a 2 channel file, where the left channel has a -20dBFS sine wave, but the right channel is completely silent.
NB It is often good to use an Upmixing plug-in such as Waves UM226 to move stereo music to surround systems, because it’s useful to delay the music going to the surrounds so it images to the screen rather than the surrounds, which will be closer to the audience (see Haas precedent effect). The surround panner just adjust the volume to each speakers, which can be fine for sound effects, but not so good for music.
Default pan position
The default pan for a stereo sound file is similarly “interesting” to the mono default. The -20dB stereo file hits the outputs at these levels: FC at -25.6dB, to FL and FR at -19.3dB, and to Surround at -25.5dB. So it’s actually boosting the stereo file to FL and FR by 1dB, and sending it to everywhere else at 7dB lower. The -20dB stereo file with silence on the R channel gives us FC at -31.7dB - so clearly the panner is feeding the L and R signals into the C channel, which makes sense as the diversity is set to 0.3; and we’re also seeing the L channel appear in the R channel as well at -32dB - so the default pan position feeds the L channel to the R channel, and the R channel to the L channel.

The stereo -20dB sine wave gets us this:

The stereo -20dB sine wave, but with silence on the Right channel gets us this:

To route stereo input to Front Left and Right only
This pan position gives us -20dB to Front Left only from the Left channel only, and vice versa.

The stereo -20dB sine wave gets us this:

The stereo -20dB sine wave, but with silence on the Right channel gets us this:

Diversity 1
With the diversity set at 1, the signal is going everywhere, essentially it monos the inputs, so we’re seeing both inputs mixed together and sent to all outputs. If your source audio is loud you’ll want to turn the region gain down by 6dB to prevent distortion when L and R are mixed together to create the mono input.

The stereo -20dB sine wave gets us this:

The stereo -20dB sine wave, but with silence on the Right channel gets us this:

More useful settings
To Front and Surround, no Centre
Even though the dot is right in front of the C channel, no sound will get there. There is no way to route a stereo input to front, surround AND centre using the panner - you can increase the diversity, but this will start to mono up the signal so the right channel will also appear in the left channels. The only way to do this would be to also have a Bus Send that routes direct to the Centre channel - see the Even More Control section below.

The stereo -20dB sine wave gets us this:

To LFE only
This one is nice and simple - just turn off all the speaker icons, and use the LFE slider control at the bottom
Logic reinterprets the pan setting depending on which speaker controls are on
If you disable the centre channel on a panner that is routed to centre, using the speaker icon, Logic is clever and re-routes the audio to the Left and Right channels, obeying the pan law for centre panned channels (-3db at C). Even with the surround channels turned on, no signal goes to the surround channels. Whilst this is clever, it is slightly unexpected, and confuses how we expect the panner to work.
Another example
If we take a stereo input and route it to the C channel, it goes to the Centre channel. Great! However…
(Note, our -20dB files is at -14, because the left and right channels are being combined, adding 6dB to the level - to maintain the level when mono’ing a stereo file, and prevent distortion, turn the region gain down by 6dB)
If we then turn on the Left and Right speaker icons, it does send it to the L and R channels, but now it’s not routing to the C channel anymore, which is not quite what we might expect to happen as a result of turning another speaker on! Doing this can also cause Logic to crash…..
Other Surround Panner notes
You can click on each of the blue speaker icons to mute the panner’s output to that output.
There are also these shortcuts:
Hold Command to lock diversity.
Hold Option-Command to lock the angle.
Option-click the centre dot to reset angle and diversity to the default settings
The Separation controls
These effectively mono-ish the input to specific sets of outputs. It’s rare that you might want to do this. One example is if you have an atmos track that is very stereo, it might be good to have it stereo in the FL and FR channels, but it might be too distracting to have it that stereo in the surround channels, so you could reduce the XR setting to reduce the stereo-ness in the Surround channels.
Let’s start with a stereo file to FL and FR and Surround, hard panned L to L, and R to R.
Using our stereo file that has the R side silent, we can see that turning on Separation and adjusting the XR control from it’s default of 1, effectively routes the Ls channel into the Rs channel too. It does this to the Front channels too, but less so. You can use the XF setting to make it more mono, but not less.
Here’s the reverse, stereo in the surround channels and mono in the front.


Another bug #3
There is another bug in Logic, which is that if you store and recall Surround pan presets, for example all the settings to route something to Surround R, the mini pan icon on the mixer and channel strip doesn’t update its image. You need to manually change a setting within the panner to get the icon to update.

Note, if you recalled a preset pan position, the mini icon on the mixer doesn’t properly match the actual panner control
Further control over the channels
It can still be difficult to get the precise balance you want in your speakers using the panner. Some additional control can be added using a Multi-channel Gain module, which then gives you individual level control over each channel. As plug-ins are inserted before the panner, you need to send your channel to a bus and add the Multi-channel Gain plug-in to that for it to work properly. The easiest way to do this is to create a Track Stack (of the Summing type) that contains just that track.

Even more control over the channels
There are plenty of times when you want really precise control over channel assignments. A simple way to do this is to ignore the surround panner altogether, and use Aux/Bus Sends. A good example of when you might do this is if you are using a 5.0 or 5.1 file and want to completely remix what it’s doing, or where it’s going. Or if you are routing 4 channel ambisonic files.
In the image below, I’ve brought in one channel from a 5.0 file. On the channel I’ve disabled the main output, and am routing it just to Bus Send 33. Bus 33 is taking a mono input and using the Surround panner to send to to FL only, and then routing to Bus 24 which is my SFX sub-mix bus. I have another 5 bus’s, doing the same for FC, FR, Ls, Rs. This enables me to route precisely to just one bus, or to multiple bus’s by using multiple sends.
This method is very precise but very messy.
Inputs and Outputs
Logic allows you to select how your surround outputs are routed to your sound-card’s output’s. Ditto for inputs if you wish to record surround sound in to Logic. This is done in Preferences > Audio.
Where possible, aim that your Stereo output is not mapped to the same outputs as Front Left and Right.
You can map which of your surround sound speakers are mapped to which soundcard outputs. Note, that I’ve routed the Stereo Output to some unused outputs, 17 & 18. Otherwise, if your Stereo output and your Surround L and R outputs are both mapped to outputs 1 and 2, it can all get a bit confusing inside Logic.
On the relatively unlikely occasion that you have a device that is playing 5.1 audio into Logic, you can use this control panel in Preferences > Audio > I/O assignments to ensure they’re recorded / monitored onto the correct channels.
Channel order
One of the most common standards - ITU 775 - for channel order is:
Track 1: FL
Track 2: FR
Track 3: FC
Track 4: LFE
Track 5: Ls
Track 6: Rs
The next most common is the same, but it goes 1:FL, 2:FC, 3: FR, 4:LFE, 5:Ls, 6:Rs instead. There are several other standards with different channel orders, used by different stations and industries. Consequently, it’s important to properly indicate which channel order is being used, and which channel is which - I always include a sound check file where each channel is id’d by voice, but the BLITS test tone below is also very good.
Logic internally processes all surround files using this channel order: Left, Right, Left Surround, Right Surround, C, LFE. And this is important when you start using Audio Unit plug-ins to process surround sound files. If you patch in a 5.1 metering plug-in that uses a different channel order you might see the C channel metering on the Left Surround meter.
Melda Audio’s plug-in MChannelMatrix can be used to ensure plug-ins get the correct inputs, and can be used to get them back to Logic's internal order again after processing. This is really important as otherwise you just get random stuff coming out of random speakers.

Using a matrix plug-n to send audio from Logic’s format to a sensible format, and back again. Actually, this plug-in allows you to change the input order in the preferences, but many do not.
Dolby Atmos
Logic 10.7 introduced new features for Apple’s version of Spatial Audio. This is intended more for creating Spatial Audio for a music track to be listened to on AirPods, than for film/TV post production work. The new 3D Object Panner plug-in is essentially identical to the Surround Panner plug-in, with a slightly different (and less channel oriented) approach. Beyond that, not a lot appears to have changed on the surface, but there are some sizeable differences under the hood about how audio is routed.
Audio that routes direct to the master surround output, for example using a Surround Panner or Balancer works as normal. However, when you export your mix, audio is taken from the output of the Atmos plug-in in the master output, not the master output itself, i.e. any plug-ins you add after the Atmos plug-in will not have any effect on your bounce. So, if you want to do some multi-band compression this needs to happen above the Atmos plug-in. You can still add metering plug-ins below the Atmos plug-in.
If you pan a sound using the 3D Object Panner, the audio is passed straight from the panner to the Atmos plug-in. This means that any plug-ins above the Atmos plug-in in the Master channel will have no effect whatsoever on channels using the 3D Panner. If you place a channel with a 3D Object Panner in a summing track stack, the audio will not route via the track stack master channel, nor will any effects on that summer process audio. But the track stack master volume control will affect the 3D object panner volume! For channels with a 3D object panner, the only place you can process the audio is on the channel itself - it can’t be processed via a track stack or bus.
There’s a good video introducing the spatial audio features here.
The introduction of Dolby Atmos for Logic is the first major new surround sound related feature for many years.
Downmixing
Logic does have a built-in down-mixer plug-in if you want to create a stereo mix for someone who can’t monitor a 5.1 mix - however it can only be inserted on the Master output, you can’t insert it on a bus or elsewhere. This can be irritating as it means that any stereo tracks that you have up-mixed to 5.1 will then be down-mixed back to stereo. If you’re doing a 5.1 mix that’s not a problem, but often we are sending off work-in-progress mixes to directors to listen to on their computers in stereo, so we may not be at the point where we have a solid 5.1 mix that folds down well to stereo.
Ambisonic work
Logic doesn’t natively support ambisonic workflows, but you can do a fair bit of first-order-ambisonics (i.e. 4 channels) work in Logic, by setting the Surround mode to Quadrophonic.
In the below image, you can see in File > Project Settings > Audio > General, the project is set to Quadrophonic.
I’ve then brought in a recording made with a Sennheiser Ambeo microphone by using the Import Audio technique, making sure it’s a 4 channel audio file (but see below bug). This will insert a Surround Balancer on the channel, and you can see the input type is Quadrophonic (the little icon above left of the SurroundZone plug-in on the mixer channel). Then you can apply 4-channel ambisonic plug-ins. In the below image, you can see the Ambeo plug-in, the Soundfield Surround Zone plug-in, the Harpex plug-in and the AmbiHead plug-in - In these tracks I was testing out which combinations of plug-in provided the nicest Ambisonic to Binaural conversion.
You can happily edit and mix A-Format and B-Format FOA files in Logic. If you use Logic’s built-in plug-in’s use them in Multi-mono mode rather than Quad mode - but where possible use dedicated ambisonic plug-ins for processing.
You can use Logic to create either a fixed binaural mix of your ambisonic file, or to convert an A format file into a B format file. You can also convert it to a quadrophonic surround file. What you can’t do is convert it to a 5.1 surround file. If, for example, I set Harpex to create a 5.1 mix of my surround file, Logic only outputs channels 1 to 4 (because Logic’s surround mode is set to 4 channel quadrophonic mode).
Bug #1 & #2 again
There is a known bug in Logic where sometimes it just won’t load in a 4-channel wav as an interleaved surround sound file properly. This is similar to Bug #1 above. This can often happen if you’ve recorded ambisonic sound using a multi-track recorder and then altered the number of channels in the file (for example, the recorder recorded 8 channels of audio, an ambisonic mic plus radio mics - and you’ve edited the file to just have the 4 ambisonic tracks). The easiest way to get round this bug is to drag and drop your 4 channel ambisonic file into a new quadrophonic Logic project, so that it appears as 4 tracks. Pan track 1 to FL, 2 to FR, 3 to Ls, 4 to Rs - use the following pan settings. Ensure the diversity setting is at 0. Then bounce the file out of Logic (ensure Surround Bounce is ticked) ti create a new 4 channel file - Logic should happily import it now. However, with some files, you may notice that when you split them apart and apply cross-fades between them, the crossfades don’t work, at all.
Workflow to get material into Logic Pro from video editing software (and another bug!)
A key aspect related to surround sound mixing is getting audio into Logic in the first place. A typical workflow for sound to picture goes like this:
During the film shoot, audio is recored to a recording device (Sound Devices, Zaxcom, Cantor, Zoom, etc); and video is recorded to the cameras or external devices. On the shoot the sound department often provide either time code receivers to attach to the cameras/recorders, or they’ll jam sync the camera at the start of the day to the recording device. This ensures that all the recording devices are working to the same time, so you know that a file that is recorded at 09:35:23.12 on the sound recorder will precisely line up to all the camera files. The sound recordist will also often send an audio feed from their bag to the cameras (over a cable or a wireless camera hop system), so that there is a rough sound mix on the camera video files.
In the edit suite the editor will bring in all the video files from the various cameras and use the timecode on them to sync the different camera angles together. They’ll then edit, using the audio guide on the camera feed. Some editors will also bring in the separate sound files from the sound recordist, sync them up (again using timecode) and use these to edit too. Most editors work in Avid Composer, and the odd few will use Final Cut or Davinci Resolve (these are the budget options for editing). Once the edit is moving towards completion the edit will do a turnover to you, where they will send you the edit so you can load it in to your DAW and edit the audio.
There are a few ways the editor can send you the files. Avid Media Composer keeps files as MXF files (which is a container for audio or video), and can either send out an EDL (Edit Decision List) file, or an AAF file, or an OMF file. These latter files contain the data of which file is used where, on the timeline, and for how long, etc. Avid can also export an Embedded OMF or AAF file, which is one file that contains both the edit information and the audio files. Ideally you would open one of these in Logic and away you go! But Logic Pro cannot open the EDL from Avid, nor can it open up an unembedded or embedded AAF or OMF reliably. You can import AAF and OMF files into Logic, but there is some bug that prevents all the files from being imported properly and files often end up missing or in the wrong place. The way I’ve successfully circumnavigated this bug is to open the OMF or AAF in Pro Tools first, then export it as an unembedded AAF from there (set the handle size to 20000ms, 20secs, so you can expand the region start and end if you need too). Select Consolidate from source media to create an unembedded AAF, where there is an AAF file and a folder of audio files.
Pro Tools export settings. Match your frame rate to what you’re suing in Logic. Set handles to about 20000ms, 20secs so you can expand the region start point and end point. Consolidate from source media will create an unembedded AAF, where you have an AAF file then a folder full of audio files
Logic Pro - import an AAF
Import the AAF into Logic.
These next steps are super critical.. You’ll see below the transport bar a blue progress bar as the file imports and creates overviews. You can click on the blue bar to see its progress. Save your session (and make sure Copy Audio Files in to your project is ticket, save it as a folder rather than a package) but do not close the project until it finishes creating the overviews. this is difficult to judge because it normally seems to freeze up when creating the last overview. When it looks done, Save again and Close Project (not the window, the whole project).
Now re-open the project. You’ll notice that the progress bar happens all over again. Again wait until it’s finished doing all these overviews, then save it again and Close the Project again.
Now re-open your project. This time you shouldn’t get any creating overview progress windows. If so, you’re good to start editing. Otherwise wait some more - it can take ages to do on a complex file, and sometimes unticking and ticking the Faster Overview Creation box can kickstart it a bit.
What happens if you don’t follow these steps? Basically Logic will get a bit confused about your files. You’ll do a load of editing, close the project and when you come to re-open it you’ll get the dreaded error message “280 or more audio files have changed in length” and 280 of your audio files will have changed position, or the region start point will be off, and everything will be out of sync and in the wrong place! This has caused me so much trouble over the years.
Now you’ve got the rough edit in from the Avid. Unfortunately it will be a mess. Volume automation, region names and markers won’t be imported, nor will any effects the editor has used. And, if they added fades to any regions these often come in as separate audio files. (This is a fault of the AAF and OMF file structure which doesn’t support any of this information). You will then need to manually sync all the sound recordists files to the guide audio track you’ve received from the editor. It can be helpful to ask them to provide a separate audio render of just the dialogue, and just the music, and any effects, to help you sync stuff up more easily. And a reference Quicktime movie, which has their temp sound edit/mix on it.
Is there a better way than this in Logic? Not from Avid, no. If the editor is working in Final Cut Pro, there is an Export as XML function. They will then need Logic on their machine, to open that XML file which will then connect to all the media on their machine. You can then save that Logic file and transfer it to the computer you want to edit on. This does work nicely and track/role names, FX, gains and lots of stuff comes across, but it depends on the editor having Logic on their machine and will create very large file sizes. More details on this here.
It’s worth saying that there’s not a neat way to transfer files between Avid Media Composer and Avid Pro Tools either, with the neatest solution being a 3rd party piece of software called EdiLoad which costs over £400!
OMF files
Logic Pro can open OMF files, but it is somewhat clunky. You will need to Quit Logic Pro, then find Logic Pro in your Applications folder. Right Click on it and select Get Info. You need to then tick the box “Open with Rosetta” (which makes Logic work in 32-bit mode). Open Logic Pro (it will probably re-scan your plug-ins) and go to File > Import > Other. You should now be able to open your OMF. You can then follow the process similiar to above - wait until it has finished creating the overviews, save and close the project. Reopen it, wait for it to rebuild the overviews, save and close the project again. Quit Logic Pro. Untick the “Open with Rosetta” box to go back to noral 64-bit mode and re-open your file.
Calibrating your studio loudspeakers monitoring level for “Broadcast levels”
There’s a great guide and set of reference files for calibrating the volume at which you mix here.
In essence, using Blue Sky test files, filtered pink noise (500Hz - 2.5kHz) @ -20dBFS should meter at mix position:
For Film mixing level: LCR and LFE should meter at 85dB, Surround @ 82dB. All dB readings should be C weighted, slow.
For Broadcast mixing level: All channels @ 78dB;
For Music: All @ 85dB.
However, many film mixers say that they will mix at quieter levels than 85dB if they’re in a small room (eg not a 50-seat film mixing auditorium) as this level is too loud for small rooms.
Before the 2010’s, BBC TV had a guide for setting levels within the mix that specified that levels should not exceed PPM 6. Dialogue should be between PPM 3 and 5. Uncompressed music should be around PPM 5, compressed music PPM 4, heavy music and effects PPM 5 to 6, background Music & Effects PPM 1 to 3.
On a digital system a -18dbFS sine wave will measure PPM 4,-14dBFS would measure PPM 5, -10dBFS would measure PPM 6. However, to quote the BBC “This is to misunderstand the dynamic behaviour of a PPM, for which -10dBFS only corresponds to PPM 6 on tone signals, not [typical audio content]”. If you normalise to -10dBFS, or set a Limiter to limit to -10dBFS, you will end up with a programme that is quieter than something that has been mixed to PPM6.
But this spec made for very variable volume levels across programmes, and essentially anything was compliant so long as it didn’t exceed PPM 6. Consequently signals would be driven hard in to brick-wall limiters to keep it loud but within spec. Nowadays, levels are specified (EBU R128) as an average across the programme. This BBC document explains it well.
The BBC target level for TV/Broadcast is -23 LUFS, +/- 0.5. For BBC Radio, the delivery spec is a Stereo 48kHz 16bit wav file, with a maximum peak of -1dBFS, and an average level of -23 LUFS, +/- 0.5. It should be mono compatible, and surround, binaural or other immersive modes can only be used with prior agreement. The following Loudness Range (LRA) is advised: Classical music 10-20 LU, Drama 6-11 LU, Rock and Pop 3-9 LU, News and Sport 3-6 LU.
The YouLean Loudness monitor plug-in provides the same analysis as Nugen’s VisLM plug-in mentioned in the BBC’s document but at a more affordable price. Logic does have a real-time Loudness metering plug-in built in, that gives you LUFS and range. Waves WLM Plus Loudness Meter also provides this feature. Izotope Inisight will give you a real-time analysis but can’t load a file for analysis.
You can also load a bounced file into Izotope RX and select the Loudness module to get full stats, or into Twisted Wave and use File > Analyse.
It is worth noting that the BBC and others amplify the signal on certain types of broadcasts, or stations. So recording something from a broadcast does not give you good reference material to work against. Typically BBC internet radio streams and downloads are amplified, on the assumption that these will be listened too on mobile phones and similar devices that don’t have a high sound output, i.e. if the broadcast was at -23 LU, it might be barely audible on a cheap mobile phone at full volume. Radio 4 broadcasts at -23 LU on DAB, but the online version of the broadcast is supposedly at -17, whereas Radio 1 broadcasts at both -14 on DAB radio, and for it’s online versions. I say “supposedly” because I have measured some of my work that was delivered and broadcast at -23LU, and the online version was also at -23.
For online platforms, the AES recommends a level of 16 LUFS with a -1dBFS peak. Different platforms have set different levels, and often apply loudness normalisation on playback to what you have uploaded. For example, Spotify plays back audio at -14 LUFS. If the track you have uploaded is louder, it will be turned down on playback. Most platforms do this - however, be wary - whilst they will all turn a too loud track down, not all of them will turn a too quiet track up! This article explains the different platforms loudness specs in more detail. This website - www.loudnesspenalty.com - will show you if your track will be turned down by the online platforms. YouTube normalise content on playback to -14 LUFS.
Note, YouTube and Vimeo do not support multi-channel audio. Most web browsers do support multi-channel playback using a HTML5 based web player - test here. The default media players in Mac and Windows do support it too. You can bounce out a 5.1 file, then use Compressor to convert it to an AC3 file to be added to the movie soundtrack.
Other broadcasters and streaming services have different levels that they want content to be delivered in. For example, PBS in the US specifies -24 LKFS +/-2 LU, with no level exceeding -2dBFS.
Typically a reference tone of 1kHz at -20dBFS should be provided on each channel, with 80Hz on the LFE channel. The BLITS channel ID provides channel ID with slightly different pitch tones on each channel.
The -1dBFS peak in a lot of the specs is because your audio will likely change format at some point in the distribution process, for example be converted to AAC or some other lossy format. The conversion process can often cause sounds that are at 0dBFS to clip and distort. The -1dBFS peak prevents this from happening. Apple’s AU plug-in RoundTripAAC simulates the process of converting to an AAC file and shows you if it will clip during the process.
Supporting resources
How to calibrate your 51 speaker system: http://abluesky.com/support/blue-sky-calibration-test-files/
Dolby 5.1 Production guidelines (from 2000): http://www.associationdesmixeurs.fr/wp-content/uploads/2015/10/Dolby-5.1-Channel-Production-Guidelines.pdf
BLITS 51 channel ID tones: http://dpp-assets.s3.amazonaws.com/wp-content/uploads/2014/01/DPPLineUpTones.zip
BBC Radio tech spec: https://downloads.bbc.co.uk/radio/commissioning/TechnicalSpecificationRadio.pdf
BBC TV audio mixing guide: https://www.bbc.com/backstage/downloads/audiomixguidelines.pdf
Netflix delivery spec: https://drive.google.com/file/d/0B37xotBvlV3Qc1E4VW5sMzNwcmc/view
Blog post: https://www.proaudiogirl.com/post-production-basics-broadcast-limiters-and-loudness-metering/